Moveit rviz demo
Planning with MoveIt 2 Using RViz
- The easiest way to run MoveIt 2 on your robot is through the RViz plugin. With RViz you can plan, visualize, and also execute trajectories for various planning groups on your robot. To get started using MoveIt 2 with RViz, execute the following command in a terminal. (Press Ctrl+C in the terminal to terminate)
ros2 launch stretch_moveit2 movegroup_moveit2.launch.py
- You should see Stretch visualized in RViz with joint positions exactly as they appear on the actual robot (If not, home the robot and start from step 1!). You can select a Planning Group from the drop down menu that allows you to choose a group of joints to plan for and control using MoveIt. When you select a Planning Group the joints that can be controlled are highlighted with interactive markers. Let’s go ahead and select the stretch_arm planning group.
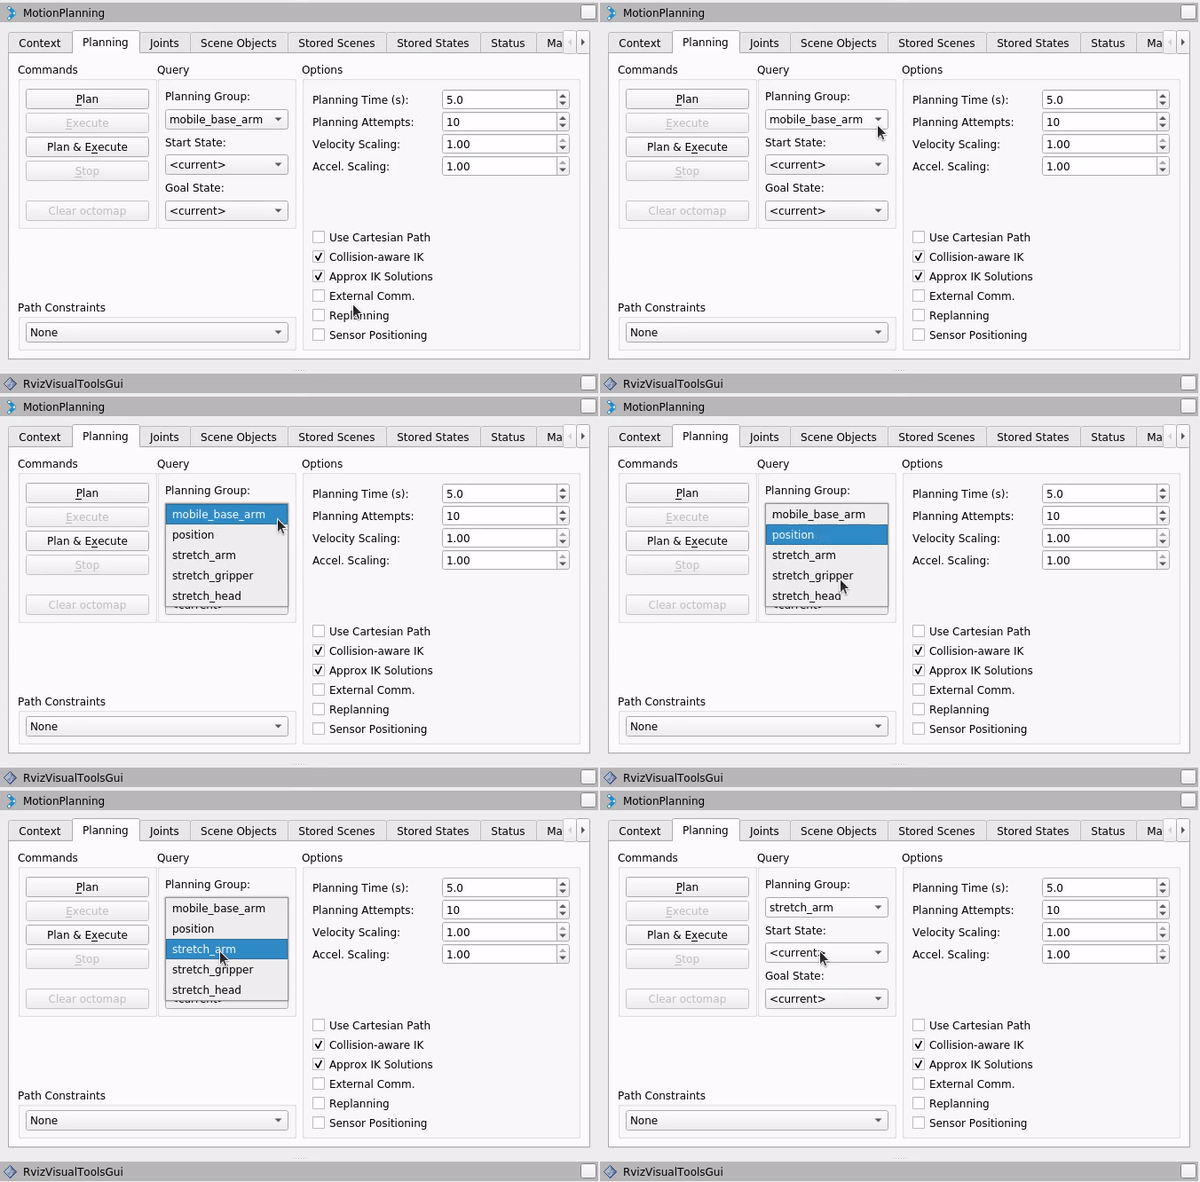
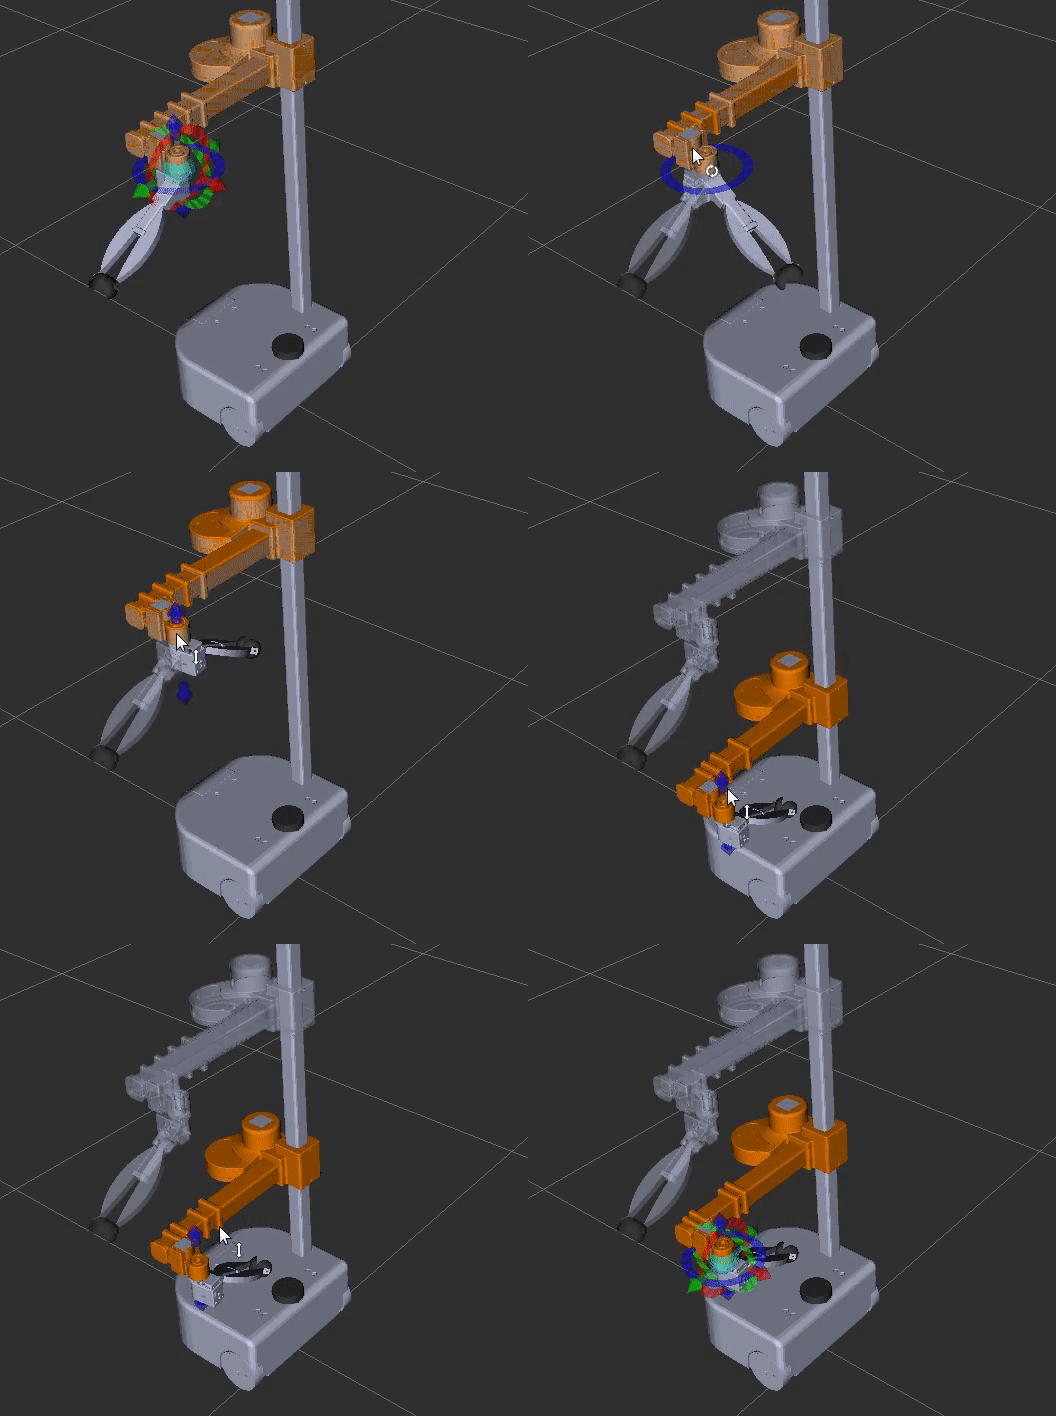
- Now, click and drag the arrow down to slide the arm lift downwards and then use the wheel to turn the gripper inwards so that it fits squarely over the robot base. At this point if the robot base glows red in RViz, it means the robot arm is in collision with the base. You should move the lift upwards slightly until the red highlight disappears.
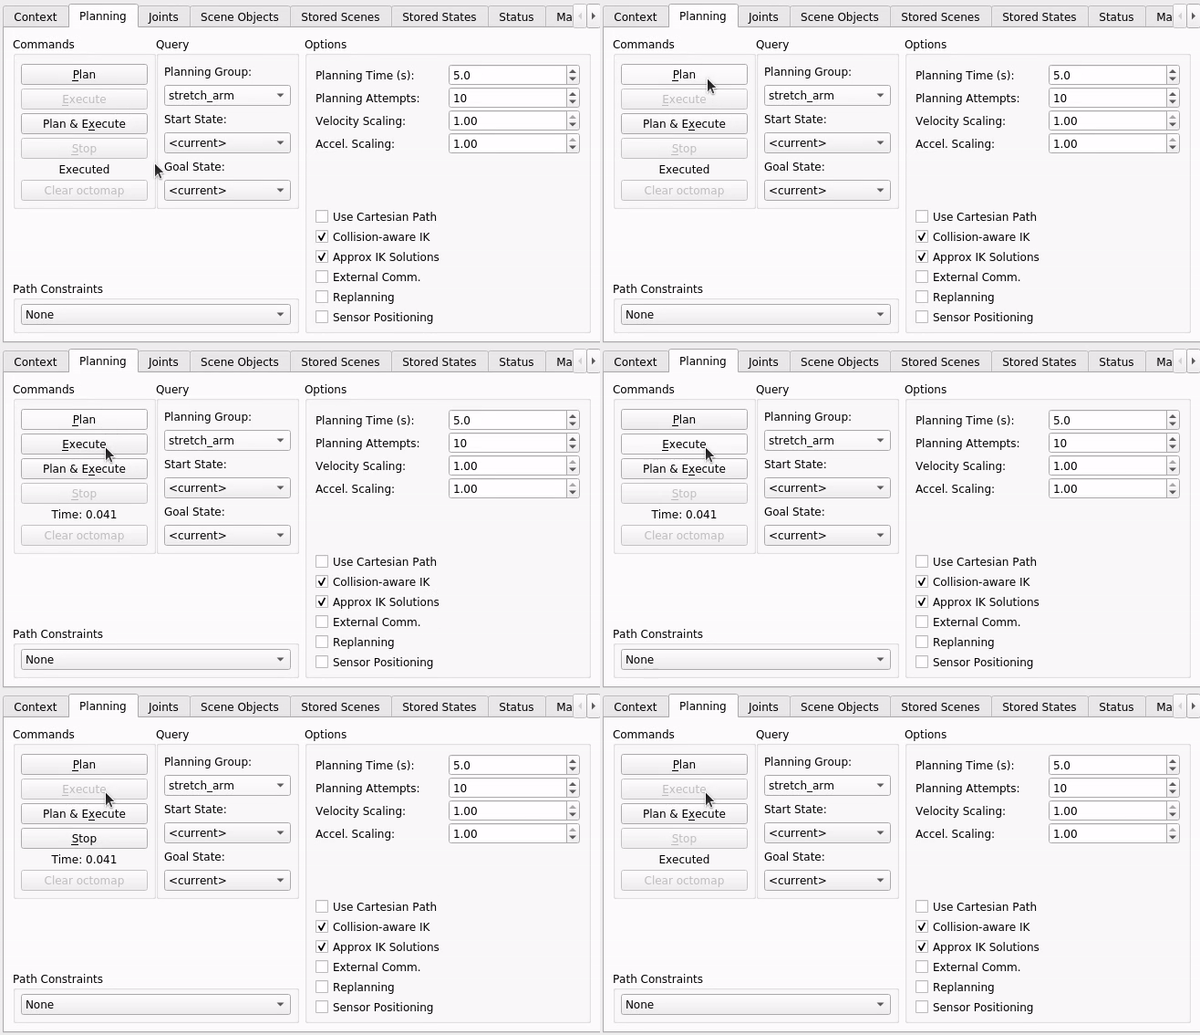
- Now click on the Plan button to see the simulated motion of the robot in RViz
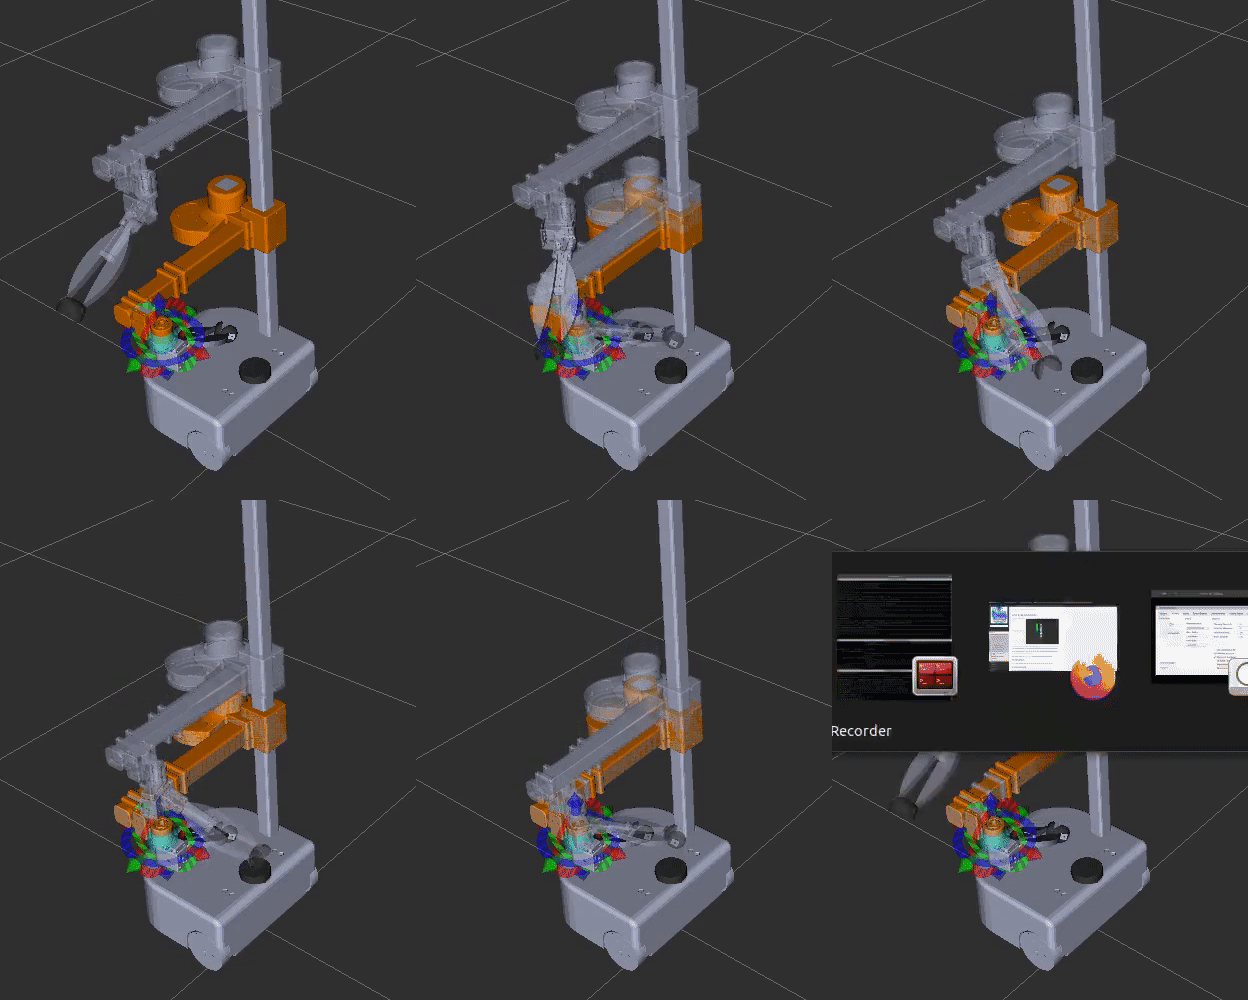
- Before proceeding, ensure that the robot is in an open space without obstalces. Click the Execute button to execute the plan on the actual robot. Congratulations, you just stowed the robot arm using MoveIt! (Alternatively, if you do not want to review the simulated plan, you can click ‘Plan and Execute’ to execute the planned trajectory directly)
- Now, let’s move Stretch’s mobile base! Select the mobile_base_arm planning_group from the drop down menu. You should see the base interactive marker appear in RViz. Use the arrow to drag the base forward or backward for about 1m. Click Plan and Execute when you are done. Voila!
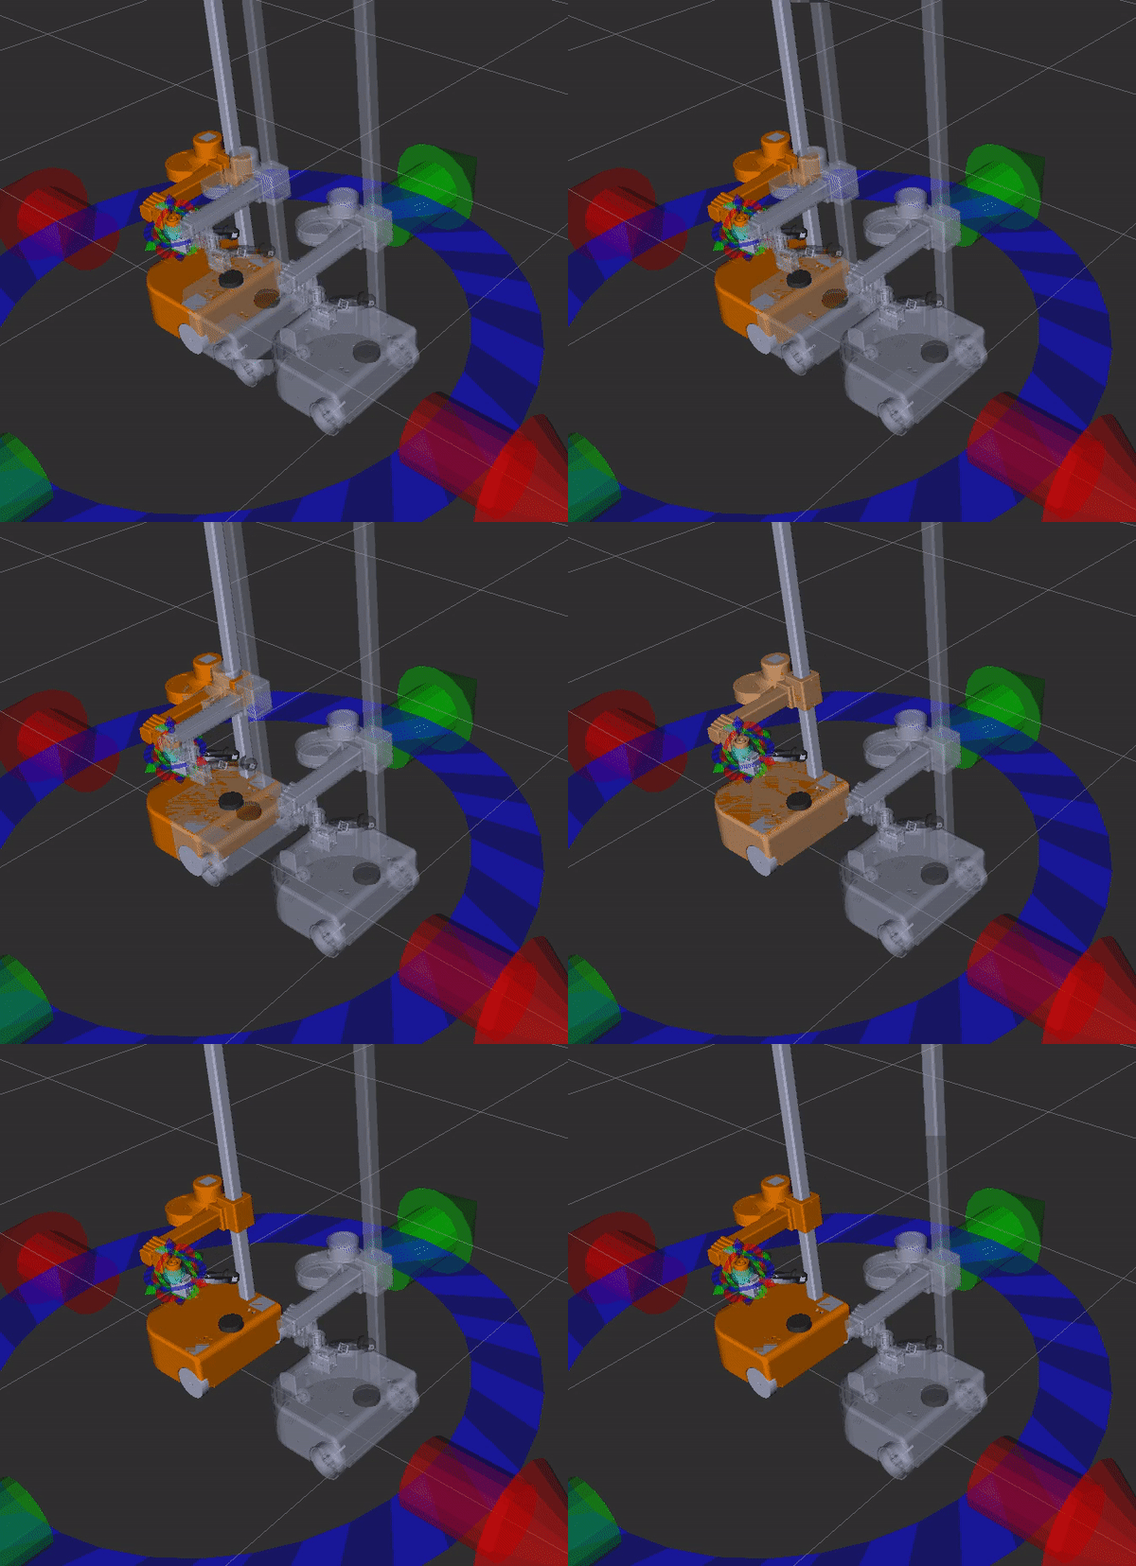
The mobile_base_arm planning group also allows you to execute a coordinated base and arm motion plan. Go ahead and move the markers around to plan some fun trajectories, maybe make Stretch do a Pirouette! Similarly, the stretch_gripper and stretch_head planning groups allow opening/closing the gripper and panning/tilting the camera.
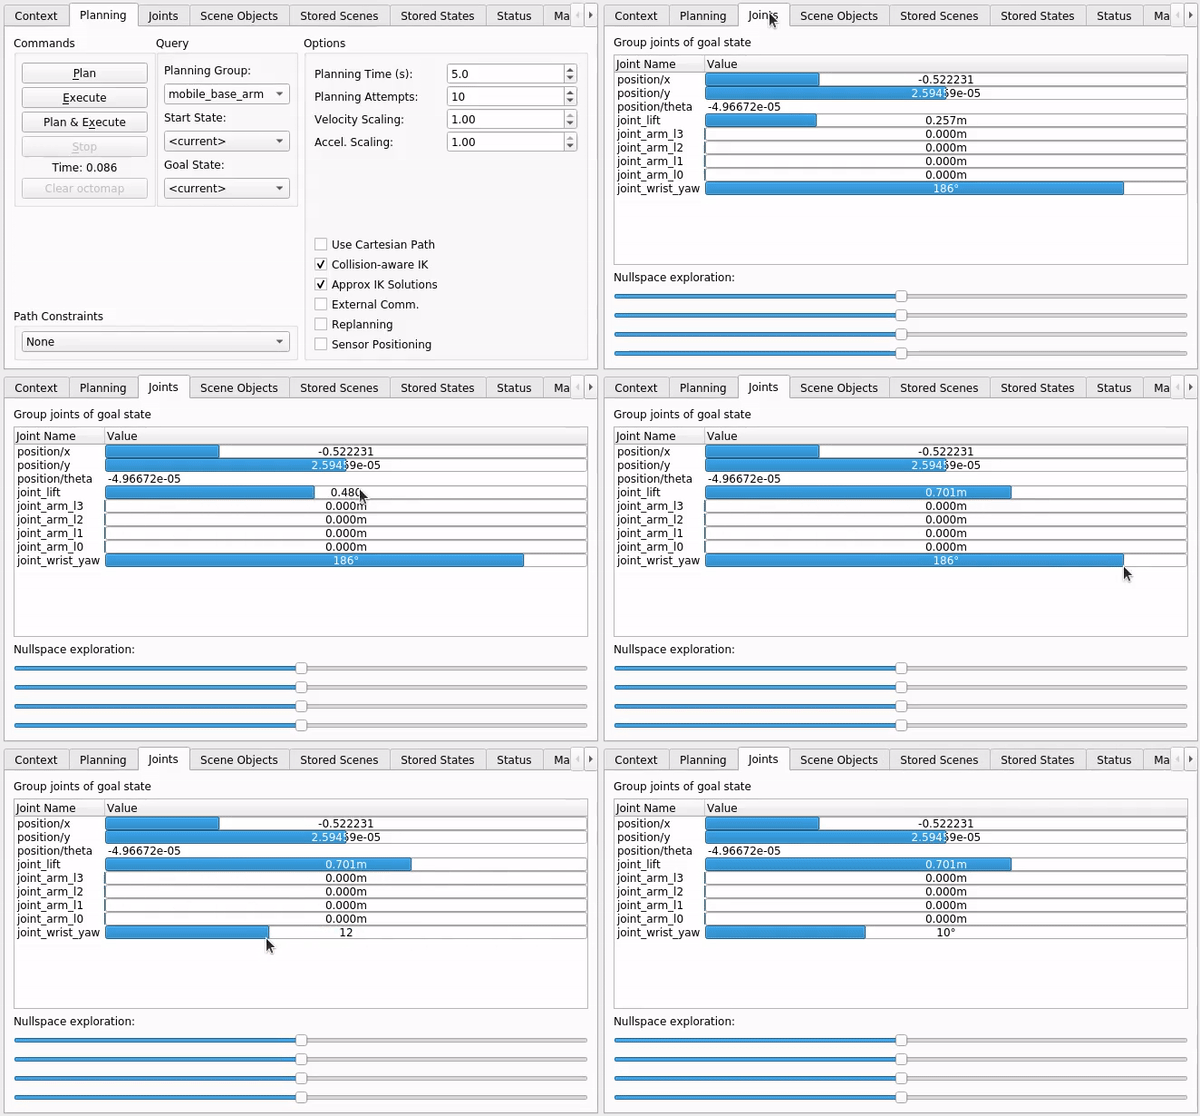
- The interactive markers are just one way to control the joints. If you want a finer control, you can switch to the Joints tab of the plugin and use the sliders to adjust the desired end state of the joints.
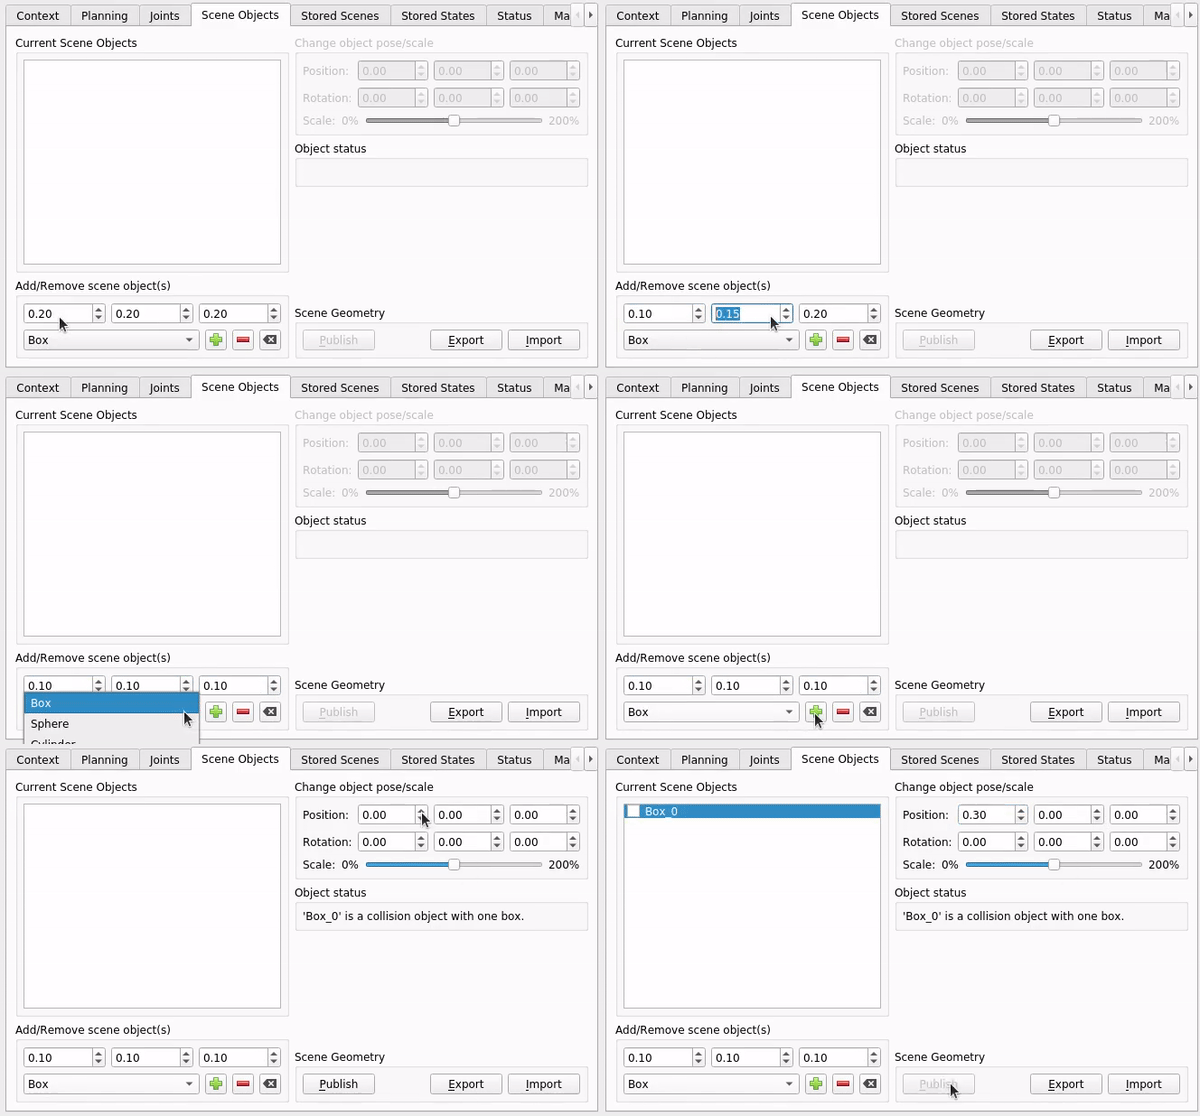
- MoveIt allows you to plan not just simple trajectories but also avoid obstacles. Let’s add an obstacle to the planning scene. Click on the Scene Objects tab and select the Box object. Define a cube of dimensions 0.1x0.1x0.1m and add it to the scene using the green + button next to it. Now, place it just in front of the mobile base using the fine controls in the Change object pose/scale buttons to the right. Click on the Publish button for MoveIt to account for the object while planning.
- Now return back to the Planning tab and define an end state such that the Box is in between the robot start and end states. Again, ensure that the robot has enough space around it. Plan and Execute!
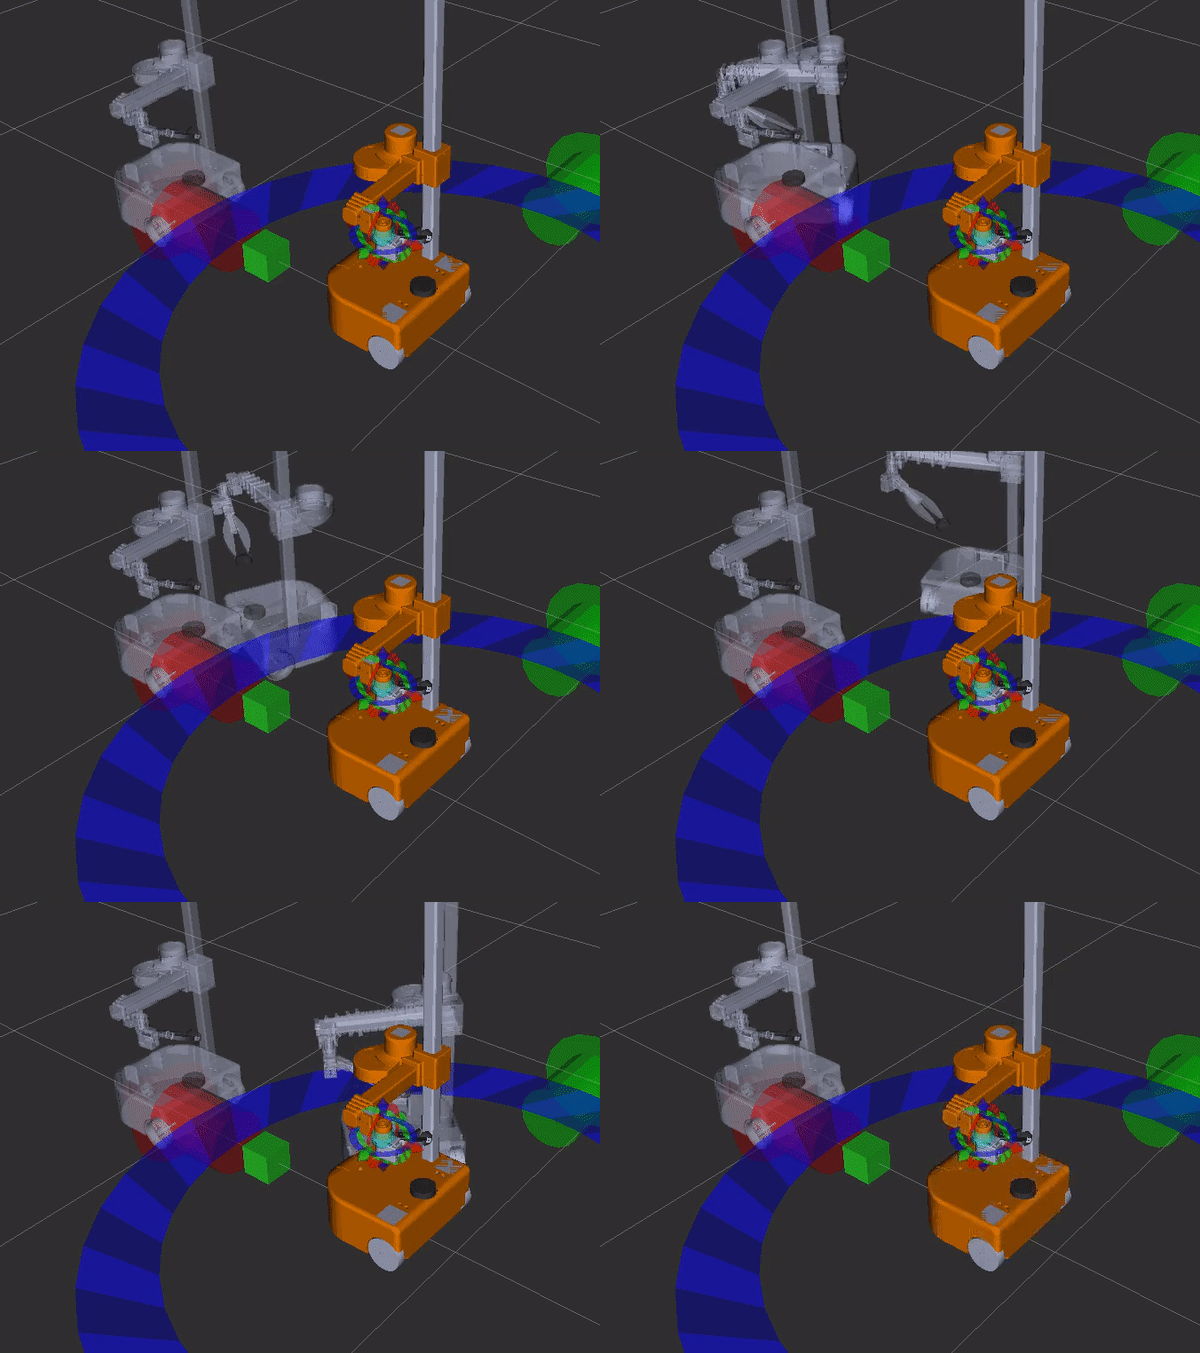
With a fully functional perception pipeline, the planning scene can represent Stretch’s surroundings accurately and allow Stretch to manipulate and navigate in a cluttered environment
- Feel free to explore more sophisticated planners shipped along with MoveIt 2 in the Context tab. End!