Realsense Camera
Quick Hardware Check (No ROS 2 Required)
Stretch includes a standalone visualization tool for debugging RealSense cameras without launching ROS 2.
To view the head D435i camera:
stretch_realsense_visualizer.py

It opens a live window showing the RGB image on the left and the color-mapped depth image on the right.
By default, it uses the head D435i, or the wrist D405 when launched with --d405.
To view the gripper D405 camera:
stretch_realsense_visualizer.py --d405

You can also adjust exposure settings using the --exposure flag. For example, to modify exposure on the D405:
stretch_realsense_visualizer.py --d405 --exposure low
The --exposure option supports auto, low, medium, or a manual integer value in the range [0, 165000].
Note
Exposure settings applied via this tool are temporary and only affect the running session. They do not persist and will not carry over to ROS 2 camera nodes.
To see all available options, run:
stretch_realsense_visualizer.py --help
$ stretch_realsense_visualizer.py --help
For use with S T R E T C H (R) from Hello Robot Inc.
---------------------------------------------------------------------

usage: stretch_realsense_visualizer.py [-h] [--no_gui] [--colormap COLORMAP]
                                       [--save [SAVE]]
                                       [--save_limit SAVE_LIMIT] [--d405]
                                       [--exposure EXPOSURE]

Tool to test the Realsense D435i Camera.

options:
  -h, --help            show this help message and exit
  --no_gui              Show no GUI while reading images.
  --colormap COLORMAP   Valid OpenCV colormaps at 'https://docs.opencv.org/mas
                        ter/d3/d50/group__imgproc__colormap.html'.
  --save [SAVE]         Save as .avi video to given filepath at end of script.
  --save_limit SAVE_LIMIT
                        The number of minutes of data to save.
  --d405                By default, this tool shows the D435if head camera
                        imagery. Setting this flag causes the tool to instead
                        show the D405 wrist imagery.
  --exposure EXPOSURE   Set the D405 exposure to ['low', 'medium', 'auto'] or
                        an integer in the range [0, 165000]
Capture Image
In this example, we will review a Python script that captures an image from the RealSense camera.
Begin by running the stretch driver.launch file.
ros2 launch stretch_core stretch_driver.launch.py
To activate the RealSense camera and publish topics to be visualized, run the following launch file in a new terminal.
ros2 launch stretch_core d435i_low_resolution.launch.py
Within this tutorial package, there is an RViz config file with the topics for perception already in the Display tree. You can visualize these topics and the robot model by running the command below in a new terminal.
ros2 run rviz2 rviz2 -d /home/hello-robot/ament_ws/src/stretch_tutorials/rviz/perception_example.rviz
Capture Image with Python Script
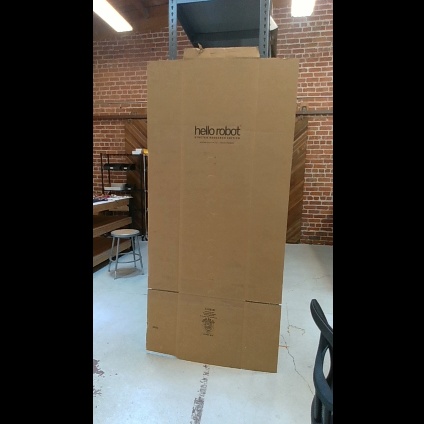
In this section, we will use a Python node to capture an image from the RealSense camera. Execute the capture_image.py node to save a .jpeg image of the image topic /camera/color/image_raw. In a terminal, execute:
cd ~/ament_ws/src/stretch_tutorials/stretch_ros_tutorials
python3 capture_image.py
The Code
#!/usr/bin/env python3

import rclpy
import sys
import os
import cv2
from rclpy.node import Node
from sensor_msgs.msg import Image
from cv_bridge import CvBridge, CvBridgeError

class CaptureImage(Node):
    """
    A class that converts a subscribed ROS image to a OpenCV image and saves
    the captured image to a predefined directory.
    """
    def __init__(self):
        """
        A function that initializes a CvBridge class, subscriber, and save path.
        :param self: The self reference.
        """
        super().__init__('stretch_capture_image')
        self.bridge = CvBridge()
        self.sub = self.create_subscription(Image, '/camera/color/image_raw', self.image_callback, 10)
        self.save_path = '/home/hello-robot/ament_ws/src/stretch_tutorials/stored_data'
        self.br = CvBridge()

    def image_callback(self, msg):
        """
        A callback function that converts the ROS image to a CV2 image and stores the
        image.
        :param self: The self reference.
        :param msg: The ROS image message type.
        """

        try:
            image = self.bridge.imgmsg_to_cv2(msg, 'bgr8')
        except CvBridgeError as e:
            self.get_logger().warn('CV Bridge error: {0}'.format(e))

        file_name = 'camera_image.jpeg'
        completeName = os.path.join(self.save_path, file_name)
        cv2.imwrite(completeName, image)
        rclpy.shutdown()
        sys.exit(0)

def main(args=None):
    rclpy.init(args=args)
    capture_image = CaptureImage()
    rclpy.spin(capture_image)

if __name__ == '__main__':
    main()
The Code Explained
Now let's break the code down.
#!/usr/bin/env python3
import rclpy
import sys
import os
import cv2
You need to import rclpy if you are writing a ROS Node. There are functions from sys, os, and cv2 that are required within this code. cv2 is a library of Python functions that implements computer vision algorithms. Further information about cv2 can be found here: OpenCV Python.
from rclpy.node import Node
from sensor_msgs.msg import Image
from cv_bridge import CvBridge, CvBridgeError
The sensor_msgs.msg is imported so that we can subscribe to ROS Image messages. Import CvBridge to convert between ROS Image messages and OpenCV images and the Node is necessary to create a node in ROS 2.
def __init__(self):
    """
    A function that initializes a CvBridge class, subscriber, and save path.
    :param self: The self reference.
    """
    super().__init__('stretch_capture_image')
    self.bridge = CvBridge()
    self.sub = self.create_subscription(Image, '/camera/color/image_raw', self.image_callback, 10)
    self.save_path = '/home/hello-robot/ament_ws/src/stretch_tutorials/stored_data'
    self.br = CvBridge()
Initialize the node, CvBridge class, the subscriber, and the directory where the captured image will be stored.
def image_callback(self, msg):
    """
    A callback function that converts the ROS image to a cv2 image and stores the
    image.
    :param self: The self reference.
    :param msg: The ROS image message type.
    """
    try:
        image = self.bridge.imgmsg_to_cv2(msg, 'bgr8')
    except CvBridgeError as e:
        rospy.logwarn('CV Bridge error: {0}'.format(e))
Try to convert the ROS Image message to a cv2 Image message using the imgmsg_to_cv2() function.
file_name = 'camera_image.jpeg'
completeName = os.path.join(self.save_path, file_name)
cv2.imwrite(completeName, image)
Join the directory and file name using the path.join() function. Then use the imwrite() function to save the image.
rclpy.shutdown()
sys.exit(0)
The first line of code initiates a clean shutdown of ROS. The second line of code exits the Python interpreter.
    rclpy.init(args=args)
    capture_image = CaptureImage()
The next line, rclpy.init_node initializes the node. In this case, your node will take on the name 'stretch_capture_image'. Also setup CaptureImage class with capture_image = CaptureImage().
Note
The name must be a base name, i.e. it cannot contain any slashes "/".
rclpy.spin(capture_image)
Edge Detection
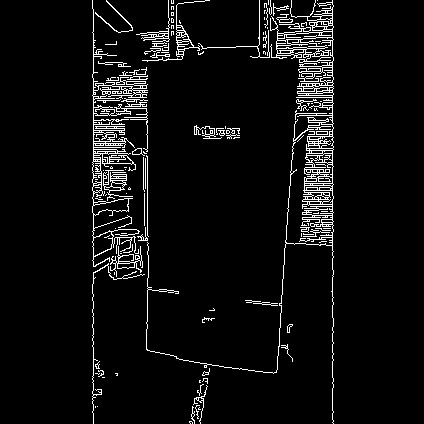
In this section, we highlight a node that utilizes the Canny Edge filter algorithm to detect the edges from an image and convert it back as a ROS image to be visualized in RViz. In a terminal, execute:
cd ~/ament_ws/src/stretch_tutorials/stretch_ros_tutorials
python3 edge_detection.py
The node will publish a new Image topic named /image_edge_detection. This can be visualized in RViz and a gif is provided below for reference.
The Code
#!/usr/bin/env python3

import rclpy
from rclpy.node import Node
import cv2

from sensor_msgs.msg import Image
from cv_bridge import CvBridge, CvBridgeError

class EdgeDetection(Node):
    """
    A class that converts a subscribed ROS image to a OpenCV image and saves
    the captured image to a predefined directory.
    """
    def __init__(self):
        """
        A function that initializes a CvBridge class, subscriber, and other
        parameter values.
        :param self: The self reference.
        """
        super().__init__('stretch_edge_detection')
        self.bridge = CvBridge()
        self.sub = self.create_subscription(Image, '/camera/color/image_raw', self.callback, 1)
        self.pub = self.create_publisher(Image, '/image_edge_detection', 1)
        self.save_path = '/home/hello-robot/catkin_ws/src/stretch_tutorials/stored_data'
        self.lower_thres = 100
        self.upper_thres = 200
        self.get_logger().info("Publishing the CV2 Image. Use RViz to visualize.")

    def callback(self, msg):
        """
        A callback function that converts the ROS image to a CV2 image and goes
        through the Canny Edge filter in OpenCV for edge detection. Then publishes
        that filtered image to be visualized in RViz.
        :param self: The self reference.
        :param msg: The ROS image message type.
        """
        try:
            image = self.bridge.imgmsg_to_cv2(msg, 'bgr8')
        except CvBridgeError as e:
            self.get_logger().warn('CV Bridge error: {0}'.format(e))

        image = cv2.Canny(image, self.lower_thres, self.upper_thres)
        image_msg = self.bridge.cv2_to_imgmsg(image, 'passthrough')
        image_msg.header = msg.header
        self.pub.publish(image_msg)

def main(args=None):
    rclpy.init(args=args)
    edge_detection = EdgeDetection()
    rclpy.spin(edge_detection)

if __name__ == '__main__':
    main()
The Code Explained
Since there are similarities in the capture image node, we will only break down the different components of the edge detection node.
Define the lower and upper bounds of the Hysteresis Thresholds.
image = cv2.Canny(image, self.lower_thres, self.upper_thres)
Run the Canny Edge function to detect edges from the cv2 image.
image_msg = self.bridge.cv2_to_imgmsg(image, 'passthrough')
Convert the cv2 image back to a ROS image so it can be published.
image_msg.header = msg.header
self.pub.publish(image_msg)
Publish the ROS image with the same header as the subscribed ROS message.